"Things which are truly worthwhile do not usually come easily, and to strive toward them is to gain strength of character." — Jay Massey

Sunday, November 23, 2014

Diversion: PVC bow take down handle

I needed to turn a small PVC bow into an even smaller piece for travel. Here is the simple way I converted it into a takedown bow.

  • First, make the bow as normal, flattening the limbs, adding recurves, etc. Tiller it as you normally would, but leave the handle section in the round.
  • Draw a straight line down the handle section longer than you want the handle to be (in my case, 4", so I made the line about 8"). Also draw where the ends of the handle should be.
  • Cut a section of PVC as long as you desire your handle to be (in my case, 4"), but one size larger. For example, my original PVC bow is 3/4"; my handle section is 1". Draw a line down the middle of the larger pipe, parallel to the edges.
  • Cut the handle of the bow as close to center as possible but on a slant of about 30-45 degrees. (I cut mine so the slant ran side to side rather than forward and back.)
  • Heat the now-cut tapered ends and, one at a time, push them into the larger handle section, up to your handle mark on the bow. The heated part of the bow will deform to the size of the round handle section. Use the straight lines to help you align everything and make sure the limbs don't go in crooked.
    • NOTE: I chose to heat the smaller pipe and push it into the larger pipe so that I could make sure they could come back out again. Heating the larger pipe and forcing onto the smaller pipe works, just so long as the smaller pipe handle section is still truly round (which mine weren't after flattening the limbs).
  • The tapered cut you made means that the more pressure is exerted on the bow limbs, the more the ends will push together in perfect alignment. If you wish, one end can be glued into the handle section for convenience.
Here are a couple of pictures that pretty much explain everything faster than I could in words. Good luck!


Saturday, November 22, 2014

More thoughts about debarking vine maple - scraper technique, part 2

After working on my vine maple stave some more with the scraper technique I discussed in my previous post, I found something new yet again.

Previously I had described how the scraper ended up burnishing the wood under the bark in the process. As it turns out, part of the last inner bark removal (the cambium layer closest to the wood back) is in part due to the act of burnishing. In slowing down, I discovered that simply burnishing over this cambium layer seems to slightly compress the wood beneath, causing the cambium layer to come away from the wood. To verify that this is what is happening, I tried burnishing over the cambium with the round shaft of a screwdriver. Sure enough, the cambium could be seen to lift away from the wood and eventually to flake off.

However, my previous assessment of the sharpened and rolled scraper edge catching on just the cambium was not incorrect. Rather, it appears that the scraper technique works by using a combination of burnishing to lift the edges of the cambium and scraping to catch the lifted edge.

Monday, November 17, 2014

Thoughts about debarking vine maple - scraper technique

I'm working on a vine maple stave at present. It's the first time I've worked with this wood. I purchased it as a dried stave with the bark on, so removing the bark is the first task. Carson over at Echo Archery has a blog post about debarking staves using a dulled drawknife. I haven't tried it yet and have been using a scraper, and in the process I think I may have discovered something interesting.

Carson points out that using a scraper is time consuming and requires a lot of maintenance. Based on this experience, I'd have to disagree. The scraper I'm using was carefully prepared with a sharp edge carefully rolled -- but that was quite some time ago. So I would identify this one as being "somewhat dulled." I find it works quickly through the outer bark, but there is the risk of cutting through the first layers of wood as one proceeds through the inner bark. This is where I think I may have discovered something through trial and error.

I first quickly (and roughly) removed the outer bark by presenting the scraper at the same angle I would if I were scraping wood -- closer to 45 degrees to the surface of the wood so that the rolled edge of the scraper really digs in and removes bark aggressively. I continue this into the inner bark until the wood is just starting to peek through.

Here is the change: At this point, I started to present the scraper to the wood at close to a 90 degree angle, maybe 5-10 degrees less. By passing the scraper back and forth quickly over the inner bark and gradually canting the scraper closer to the wood, the rolled edge of the scraper just catches the softer inner bark while the dulled part on the edge/side of the scraper rides over the harder surface of the wood, burnishing it in the process without cutting into it.

This has worked surprisingly well, even in areas where I know there are pin knots. It's all about the angle at which the scraper is presented to the wood. The closer the scraper is to 90 degrees, the less opportunity the rolled sharpened edge has to catch on anything. Tilt it just enough and the rolled edge catches on the soft raised surfaces without cutting into the harder wood beneath.

Here's a quick (but unexciting) video showing the technique on the vine maple, in case you are curious about how it works. The outer bark has already been removed, so you're looking at the removal of just the inner bark. At first I start with a heavier cutting angle (you can hear the "rasping" sound as it is coming off), then I switch to having the scraper more perpendicular to the wood. Here you can hear the "squeaking" sound of the scraper riding over the harder wood while you see the last bits of inner bark come off. (Note the importance of paying attention to the sound.) I'm not using much pressure or having to turn my wrists, so aside from the back/forth movement, I'm not working very hard to expose the wood beneath. It's all about letting the tool do the job.


It's just a matter of finesse. In some cases I'm not looking at the bark removal so much as feeling it in the scraper and listening for the change in sound. (This is one argument for the power of using hand tools and working without the day to day din of music and television in the background.)

I don't know how well this would work on softer wood such as yew or cascara because there may not be enough hardness in the sapwood for the scraper to ride over, but I imagine that the technique might work for removing the springy early wood from the harder late wood on osage. Guess I'll have to try it out.

EDIT: See the next post for further thoughts and information.

Friday, September 19, 2014

"Zatara," bamboo backed osage bow, part 3 - heat treating

As I learned from my experience with trying to heat my yew "fence post", you don't heat treat an already glued bow. So I'm heat treating the rough-tapered osage limb sections before I put the bamboo backing on. This should give me an opportunity to straighten the deflex out of them as well as hopefully improve the performance of these marginal leftovers.

All of the heat treating I've done before was done by simply holding the gun and waving it back and forth over the limbs until they changed color. It's tedious and time consuming. I expected the latter, but the former has got to be changed. So, I built a holding jig to keep the gun about 5 inches from the limbs, as you can see in the photo below. So as to evenly temper it, I'm heating only one inch of limb at a time. The first limb took about 5 minutes. At 29" of limb to heat, this is about 2.5 hours of time per limb! Fortunately, I had other things to do (clean the workshop), so it was not too big a deal to multi-task. Set the timer, then move the whole limb one inch to work the next section. Repeat.


 5 minutes seemed like a long time, but I was going by the color change. At some points 4 minutes seemed more appropriate, so I switched to that as needed. I think part of the reason it took so long was that the doors to the workshop were open, allowing some draft to pass through and rob the limb of its heat. However, I didn't want to overdo it, so I limited the time. The resulting limb looked somewhat splotchy, so I ended up treating it in a separate session later, at about 2-3 minutes per inch. I wanted the treating to really permeate the limb, and the result was a nice even deep brown.

Untreated handle on the left; treated limbs on the right.

For the second limb, I did the same routine of 4-5 minutes per limb -- but with the garage door closed, limiting the draft. Apparently this made a significant difference. After I nearly finished the limb I noticed that there were several small cracks throughout the wood! These appear to be small drying or stress cracks. Were they already there, exacerbated by the heating; or were they the direct result of heating?

Cracks can be seen in the limb on the right.
Upon inspecting the first limb, I discovered a few of those there as well, but localized to one small area as opposed to throughout the limb, as they are on the second one. As a result, I've decided that I should go back to the manual method of heating, or reducing the time if using the jig. I've also designated the "crackled" one as the upper (weaker) limb.

I don't know if these cracks will have much effect on the final bow. The cracks shouldn't pose a problem in tension, as the bamboo back will be doing the work there, but they may very well be a sign that the limb got over-treated and will crumble or fret in use. Or maybe not.  I could stop, but I've got nothing to lose but my time at this point, and I'll learn something in the process. I figure that once the bamboo back is glued on, I can hit the cracked areas with low viscosity super glue as a hedge against problems.

Time (and experience) will tell.

Yew "fence post" longbow, part 8 - filling time


Reducing and heat treating the belly has revealed the weakness inherent in the knot in the upper limb. The knot was pretty punky, and adding heat to it only made it crumble worse. While I've compensated for it some (probably not enough?!) by adjusting the width of the limb at that point, it makes me highly uncomfortable having this open "wound," if you will. As I started digging out the punky parts, the knot has revealed itself to be somewhat conical in nature, with the tip of the cone just protruding in a flattened point on the back of the stave, though it was not punky fully though. This results in the blister in the back being somewhat filled -- more crater like than an actual tunnel.


I've decided to try and fill this with a combination of yew wood dust (collected in the dust collector by grinding some yew offcuts on the belt sander) and super thin cyanoacrylate (CA) glue (a.k.a. "super glue"). What I've read on-line is that the wood dust should be reasonably fine and that it should be compacted in small layers, then soaked through with the CA glue.  Doing this on the back is pretty straightforward. It will also be covered by rawhide, so I'm mostly trying to fill the little crater here so that I don't end up with an air pocket after the rawhide goes on.


Filled and glued.
Leveled and sanded smooth.

The hole on the belly side takes considerably longer. I add just a bit of wood dust, then compact it down with the stem of a q-tip that has had its head removed. Glue is dribbled in a bit at a time to soak through, after which I pack down the wood dust again and use a paper towel to wick up any puddling glue before it dries. The whole process gets repeated again.

Partly filled...

...fully filled...

...being filed...

...and finished!
With luck, the filling process will provide some sort of structural support -- but I'm not going to count on it. I am learning that with bows, as each new problem reveals itself, although we may take measures to remedy it, we are constantly flirting with disaster. I feel like Odysseus, trying to navigate between Scylla on one side and Charybdis on the other. Let's hope things turn out better for this bow than for Odysseus's men...


Monday, September 15, 2014

"Zatara," bamboo backed osage bow, part 2 - rough limb tapering

As mentioned in the last post, the outside of the stave section from which the limb section was taken was in pretty bad shape. My hope was that by turning the back of the staves into the belly of the limbs, the problem areas would come off in tapering and tillering. Since this is going to be a backed bow, I can really treat these sections as lumber and go ahead and give them a rough taper before glue up. I'll refine the taper/tiller after it's all glued up and already starting to bend.

The limb thickness of the osage is currently a nominal half inch (just under), and I want to taper it out about 1/8" along the limb. I'll start the taper just outside where the handle section will get glued over the splice. The pieces are long enough that I can get a full 66-67" nock to nock length. Since the overall length is close to 69" and my handle is 9", I'll plan to taper 29" for each limb, which will give me a half inch margin on either side of the handle as a "safety zone" to eventually bring down when tillering.

The ideal way to taper this dimensional stock would be to use a planer, which would allow me to take 4 passes of 1/32" and call it a day. I don't have a planer, so I'm going to go to the bandsaw instead. When I first started building bows, I took a bow class in which we built bamboo backed ipe longbows by first tapering the stock by cutting it on the bandsaw using a .005" per inch pre-tapered piece of wood attached to the stock. On 29", I calculate that this makes closer to 5/32" than 1/8" (.145" total taper, to be exact), but in practice I have found that it is close enough to what I want that it works just fine. It generally means that most of the refining I do to the tiller happens in the inner limbs first.

This job is going to be a little trickier, as the stave originally had some good reflex to it. Since I'm orienting the grain in the the opposite direction, I'm actually fighting the wood a bit. Here is one of the future limbs next to my pre-tapered stock. One can see the amount of the reflex pretty clearly. In order to keep it in place for tapering on the bandsaw, I'm going to use my favorite secret weapon: blue painter's tape!


Here you can see the limb section taped to the pre-tapered stock. You'll also notice blue clamps in place. I use those to hold the limb in place against the stock so it is as flat against it as possible. The taping actually uses a technique I picked up from lutherie: One stretches the tape while applying it so that it exerts some clamping/pulling force. How much does it stretch? Not much, but enough to create some reasonable force on the two pieces, especially when applied in quantity as it is here. How much stretching is too much? If the tape snaps, you've gone too far. It's a nice self-correcting exercise.


Because the limb section is already at its maximum thickness near the handle, setting up the bandsaw fence is relatively easy: I just put the taped up piece next to the blade just outside of where I want the cut to stop, then slide the fence over until the stock is slightly snug against the blade and the teeth of the blade catch the tape when trying to pull it through. This lets me know that the blade will effectively stop cutting at that point -- plus there's that half inch "safety zone" I mentioned.

All the prep work for taping it in place took a considerable amount of time, but putting it through the bandsaw couldn't have gone smoother. Because of the direction of flex in the piece, as each part is cut and is freed from the tape, the section actually pulls away after the cut, which means that the taper is pretty consistent. Luck also appears to be on my side, as the bad sections of the piece have come just away in the tapering process. You can see the before and after in the photos below.

Limb 1: before

Limb 1: after

Limb 2: before

Limb 2: after


Saturday, September 13, 2014

"Zatara," bamboo backed osage bow, part 1 - salvaging

This series of posts is really a sequel to my "Driftwood" series describing the making of a sister bow from the salvaged offcuts of that project.

In the process of getting to a thicker growth ring and a usable length from the basket-case osage piece Jarrod gave me (which yielded the short selfbow, "Driftwood"), I removed a large, flattish section of the outside of the osage (including some sapwood) by using the bandsaw. I actually had to go down a little more than a half inch deep (if you remember from this post, the stave had already been worked down through several layers on one end), and the resulting offcut was  great than 1/2" thick and a little over 2" wide.  I couldn't very well throw the piece away, so I decided to see if I could get a bow out of it by recutting and splicing, and backing it with bamboo. Here's a bit of information about what I'm working with:

First, the 9" bow handle section was removed from one end of the offcut. One can see a trace of sapwood in the photo below. This is probably the best piece of wood out of the entire original stave! I thought it would be cool to be able to incorporate more of the stave back into the bow, so this section will make its way into the handle.

Also shown is the remaining section (original stave belly side, which will end up being the back gluing surface -- more in the next paragraph), already sawn into two pieces, about 38" in length and a little over 1" wide at the widest end (the narrower end tapers to 3/4"). You can probably also see the extreme coloring in this osage piece -- lots of red streaks. One of the major ones was bad in the section that eventually became "Driftwood," but these seem pretty solid. At any rate, they'll captured in the interior of the bow near the bamboo back, far away from the compression of the belly where they could do real harm.


The original stave, as I mentioned in the post "
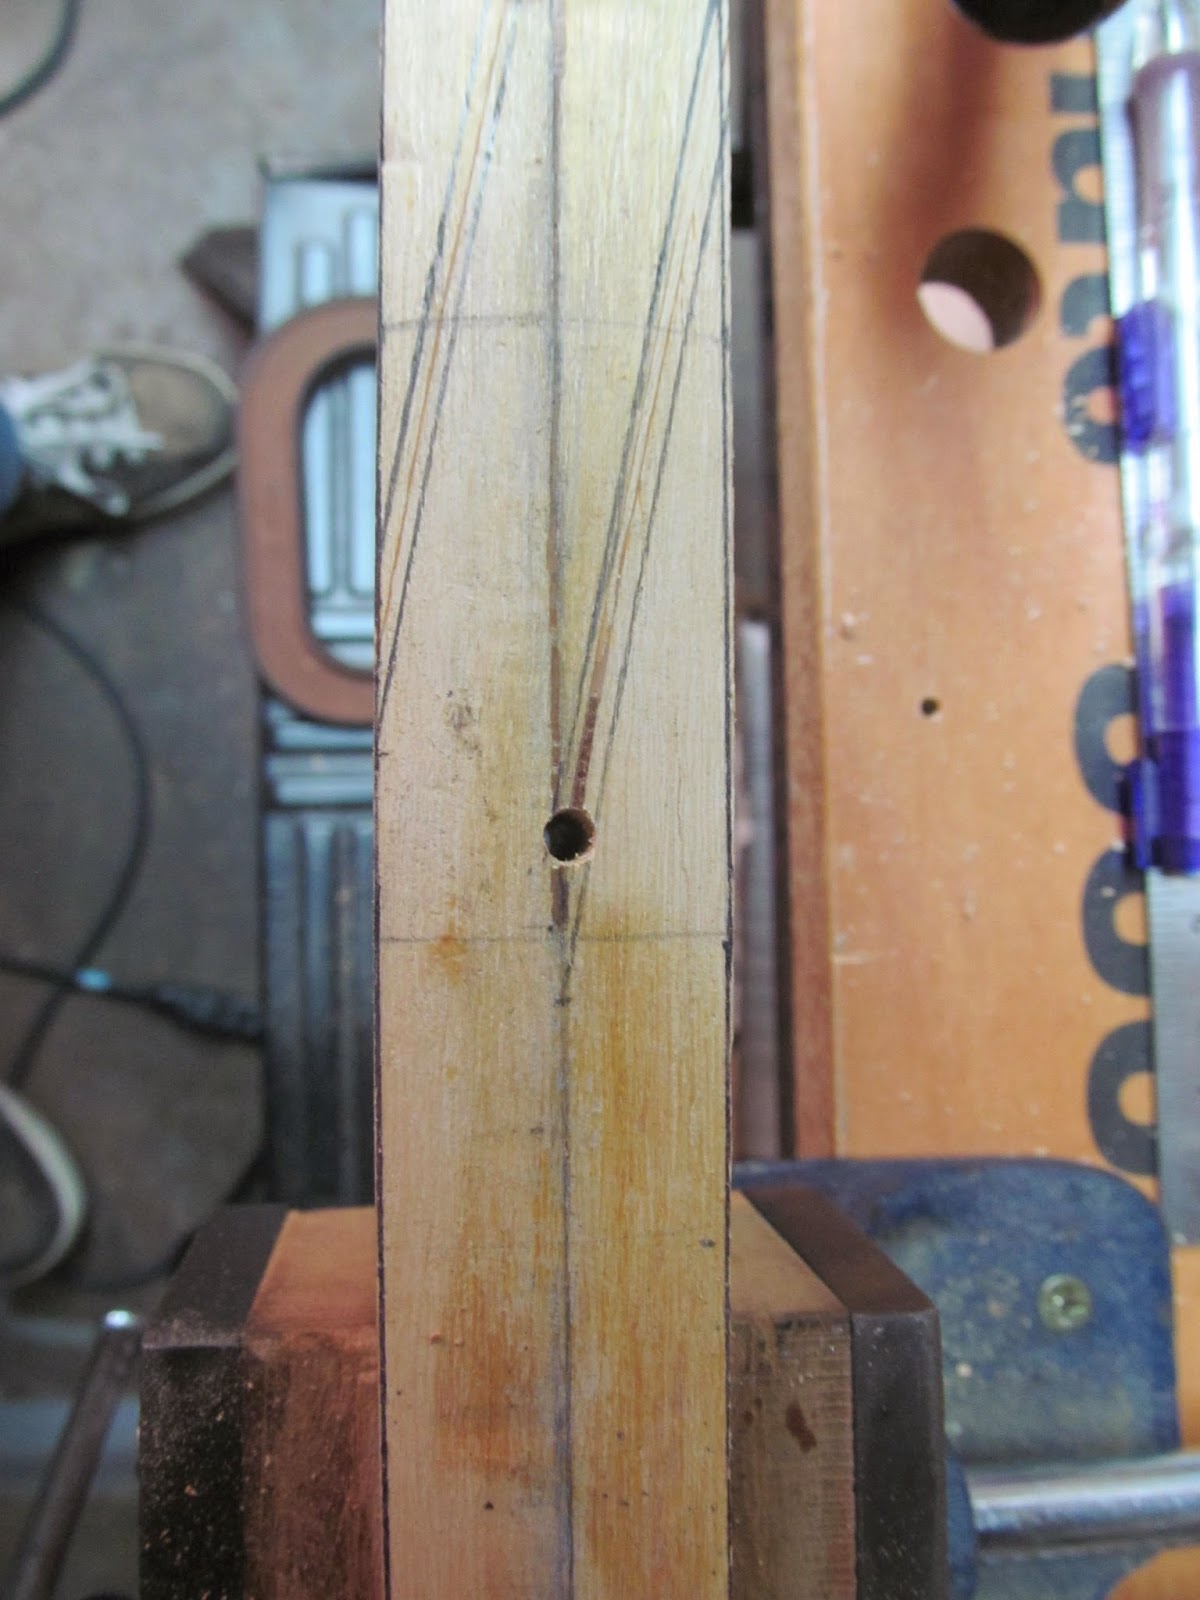
Driftwood part 1" was pretty well worked down in odd places on the back when I first got it. Normally I would try to orient flatsawn grain so that the original stave back would be next to the bamboo backing and the original stave belly would be the bow's belly. In this case, because there is so little wood to work with and because the the back was in such poor shape, I'll need to make the stave back into the new bow's belly with the hope that all of the bad spots will come off in the tapering and tillering. You can see the spots in the photos below. They are incredibly dark, as the original stave had been sitting around for some years and the exposed wood had oxidized. It's a beautiful color -- and the bright yellow of the freshly cut osage gives you a real appreciation for just how much the color changes over time!


It's probably not apparent from the pictures above just how marginal the wood is in places. The center photo shows a fairly deep cut that looks like the back of the stave encountered a radial saw! I'm really hoping that most of that will come out in the tapering and tillering -- but it's going to be close. The bottom picture shows a nice void in the middle of the stave.

Of note: Orienting the back of the stave toward the belly of the bow in the glue up does cause the rings to travel in the same plane as the eventual radius of the belly, creating the potential problem of having large sections of soft earlywood exposed, which could weaken the bow or cause hinging. However, I'm at least aware of the problem going in, so I'll know to look for it and correct for it wherever / whenever possible.

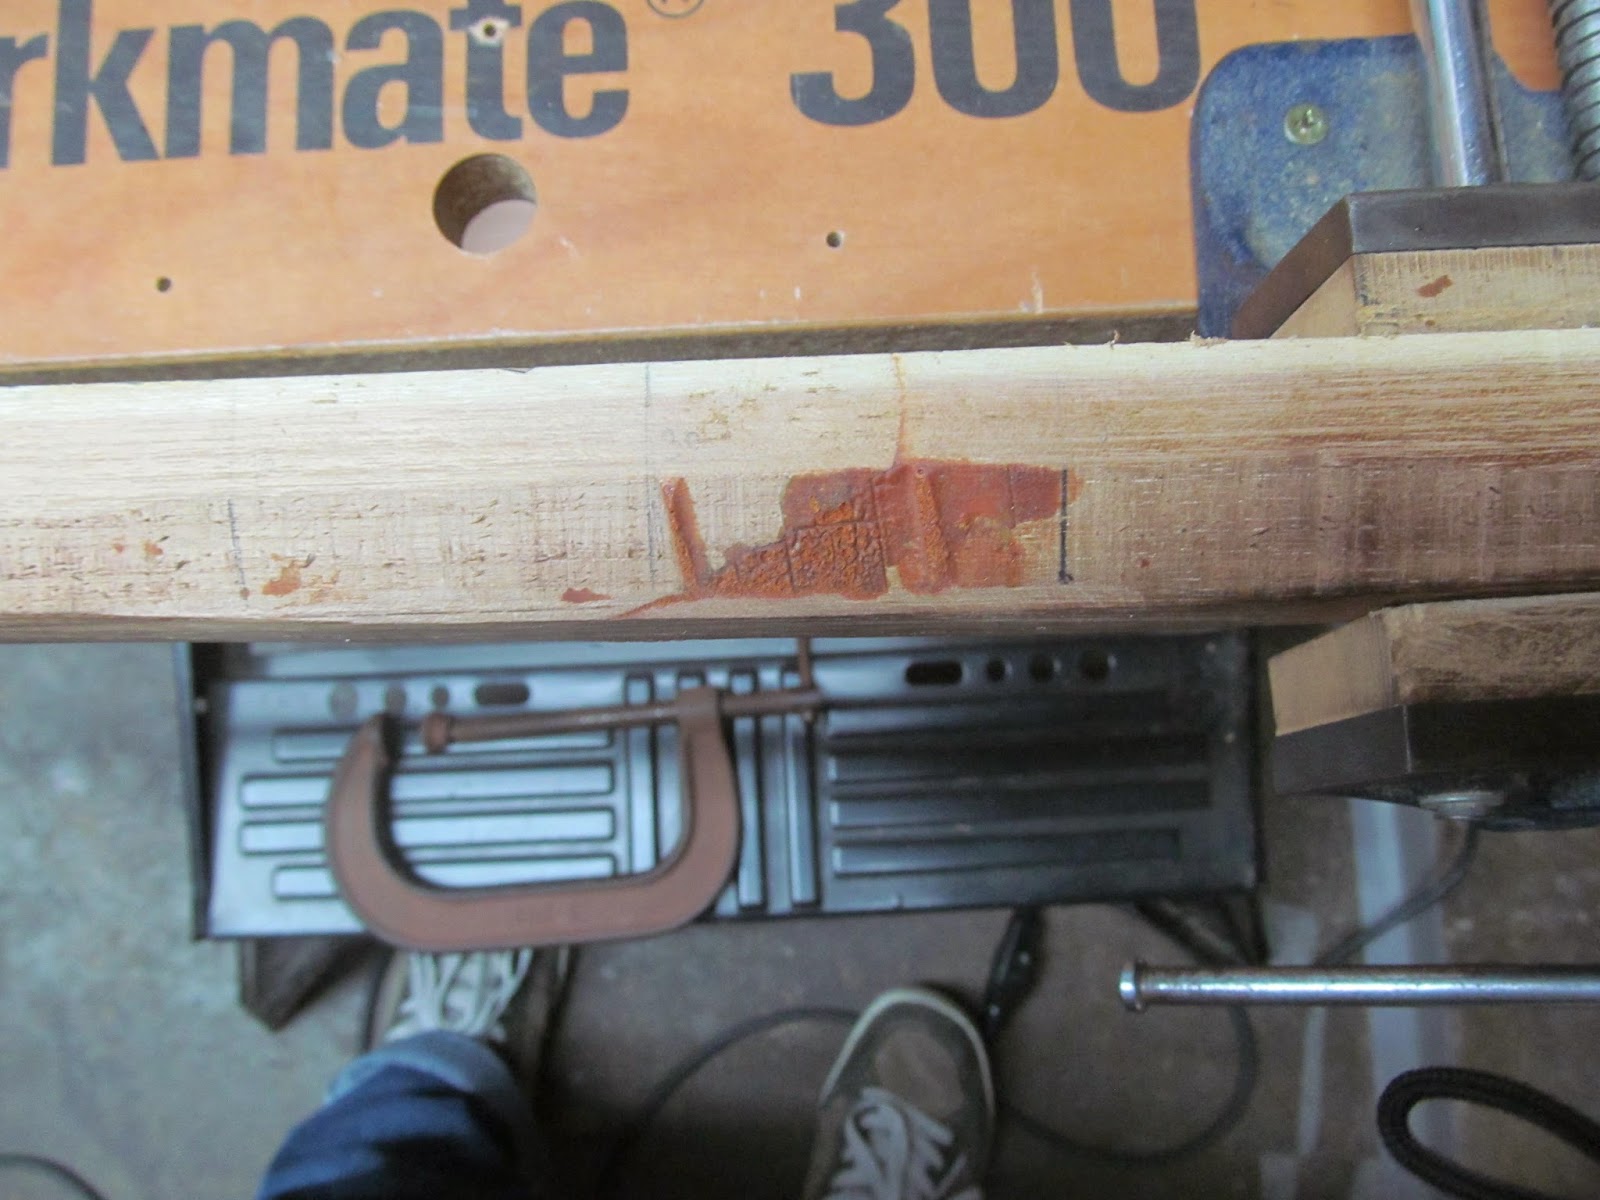
As a further appreciation for just how marginal this wood is, I've taken a couple of photos of the sides. These were the original sides of the stave, and they had all sorts of sections missing. I'm not sure that the photos do it justice. For example, what looks like 1 3/8" width on the sawn section is really reduced to 1" of usable wood once these wood voids are accounted for...


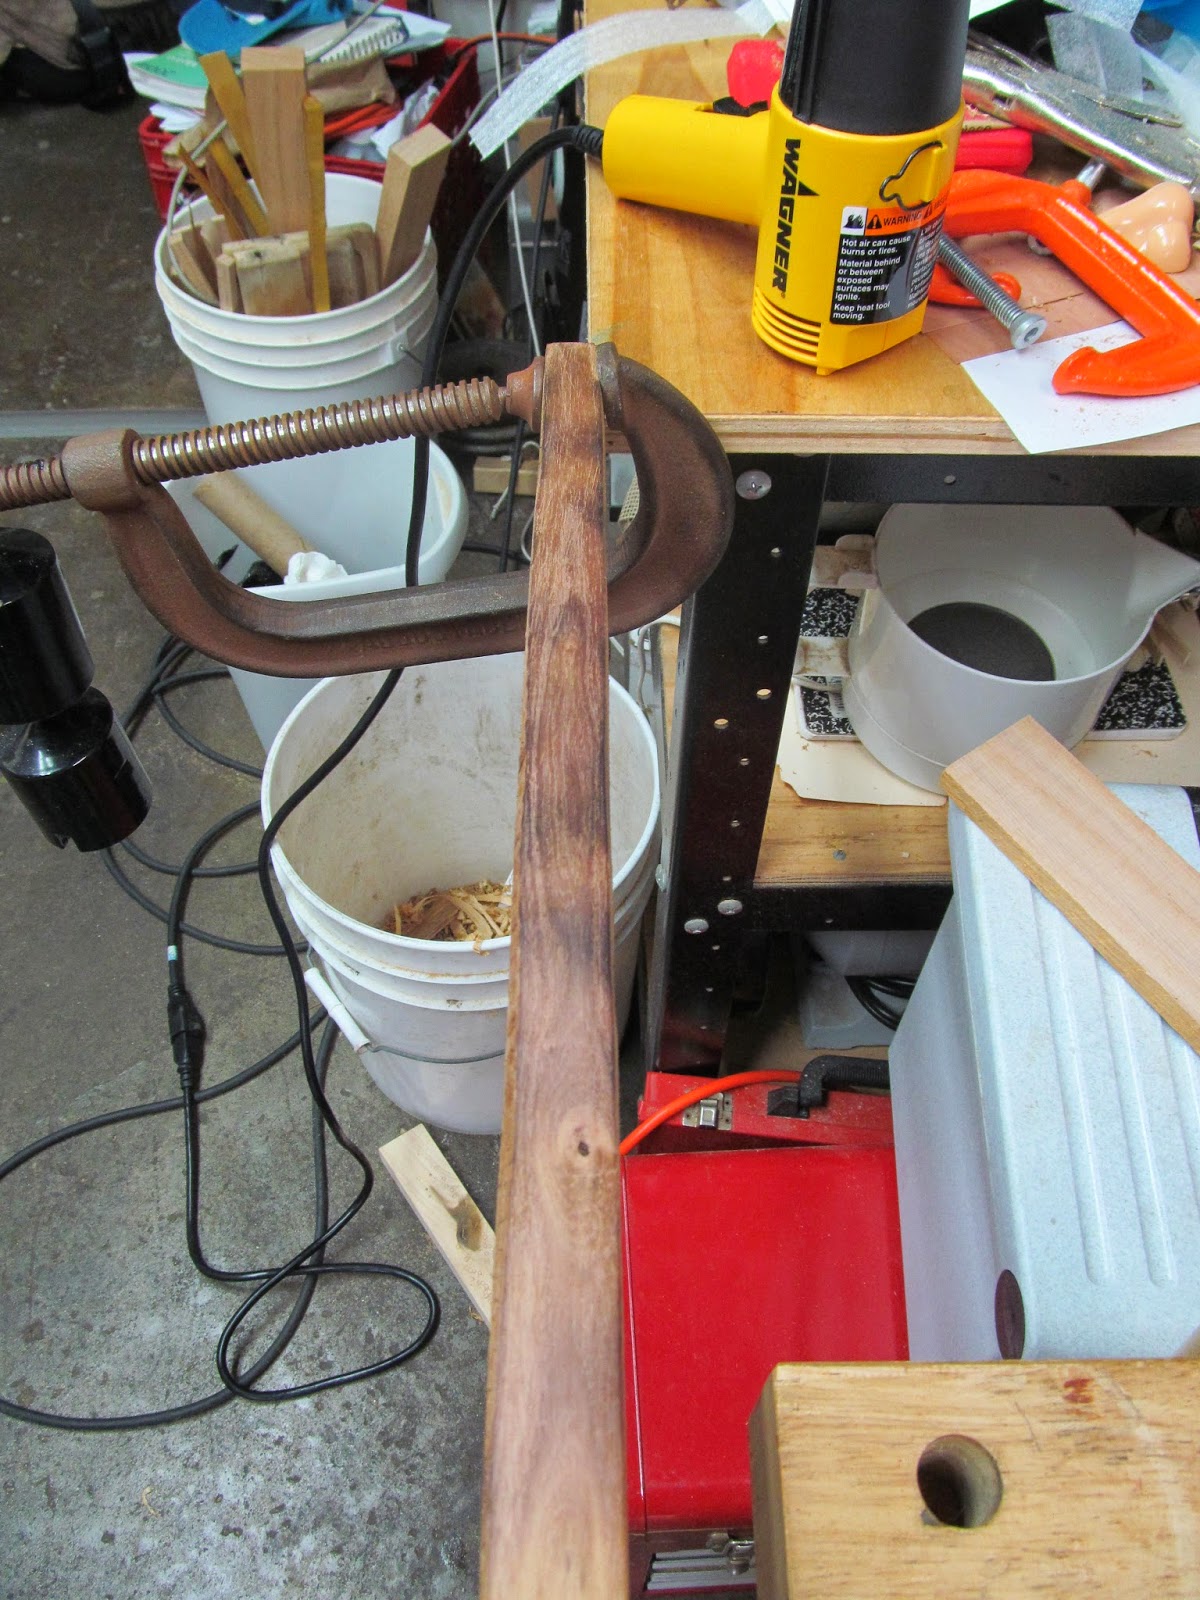
In case you are wondering about the scrawled "NOT" on the side of the left-most piece of wood in the first picture above, it was a note to myself when preparing to cut the original stave on the bandsaw. One side of the stave had some good relatively flat spots that traveled well on the bandsaw table and allowed the stave to be stable, whereas the other side had all sorts of dips that spelled trouble. Though it was fairly obvious which was which, I did not want to leave anything to chance, so I wrote the word "NOT" to remind me not to use that side against the saw's table. I hate to think that its vestige might be a sort of prophecy, telling me not to attempt to salvage this wood as a bow!

To conclude this post, I guess I should explain a little bit about the name. I was telling my friend Nick about the "Driftwood" bow I was working on and how I thought I might have enough for a second bow. I was casting about for a potential name.  "Firewood" had made the list, as it was a) appropriate! and b) reflected the spirit of the red streaks I kept finding, but Nick suggested "Zatara," the name given to Edmond Dantes in the movie version of The Count of Monte Cristo. The name was supposed to mean "driftwood" in the movie (a search on the 'Net reveals influences of Italian, Spanish, and Arabic, and it might actually mean "raft"), though there is this tidbit from one of the Yahoo! Answers pages:
Zatara is a surname. The most famous Zatara was a magician that died on the Titanic. Shortly after his death, ther were a few jokes that came about. The most famous that stuck was: The Great Zatara was performing on the Titanic. One day a man with a parrot was in the audience. This parrot started to heckle The Great Zatara. Parrot voice: “Browk, it is in his hat!” Parrot voice: “Browk, it is his hand!” Parrot voice: “Browk, it is his pocket!” That night the boat hits an ice berg and sinks. The Great Zatara wakes up on a piece of driftwood with the Parrot. Two days go by with the two of them just staring at each other – really glaring! Then the Parrot says, “Ok, I give, Where’s the boat?” The producers of the movie The Count of Monte Cristo heard that joke and gave tribute to The Great Zatara by giving the name to Edmond Dantes and changed it to mean driftwood. (There are ancestors of The Great Zatara that have kept the name. They are mostly in Ireland.)
Regardless of whether or not it is a real word, I liked the connection to the name of its sister bow, and that making a working bow out of this other piece of "driftwood" is going to take some magic. That, and I already promised Nick I would make him a bow, and this might as well be it. (Unless it doesn't turn out!)

Monday, September 8, 2014

Yew "fence post" longbow, part 7 - resplicing

I decided to bite the bullet and cut the splice apart. I've outlined the steps below, just in case anyone is crazy enough to want to do so too!

Step one was to mark out the areas to be cut, on either side of (and parallel to) the current glue lines. By marking the new lines out a mere half inch on either side of the end of the splice along the center line, I should only end up losing about an inch in total from the length. One can note from the images that this results in a narrow (but reasonable) area in which to cut the slanted parts of the splice. By my reckoning, I should be able to cut exactly along the glue line, then pare back to the penciled lines and have a new splice joint pretty close to fitting spot on...


...but first, I'll need to drill a hole just big enough for me to snake a coping saw blade through! The hole is drilled not at the very end of the splice, but in my closest approximation to what will be a waste area (based on the penciled lines). This means I will need to saw in both directions, but I want to have as clean a spliced line as possible.

Starter hole from the back.

Starter hole where it exited the belly.
Fortunately, I was able to drill a pretty straight hole (having a wood bit and marking the start with an awl helps). Below you can see the coping saw "in action." (Actually, I had to switch hands and am not really sawing here, as the other hand is holding the camera -- but you get the idea!) This is followed by an image of the finished "inner cut."


Things got a little jagged running the other way, as I was using my left hand. It got a little detracked on the belly side, so I had to recut a section there. No worries -- I'll fill that tiny section with a wood offcut, and the glue should patch it right up. I finished up the last bit with a Japanese pull saw, as it had no back and just fit in the slot. This worked great, as it was a lot sharper than the coping saw blade, despite the latter being new. It also did wonders on cutting the slants quickly but accurately.

Below is the cut-apart splice, waiting to be trimmed up. (The blue on the interior of the right piece is paint or something from the writing on the Japanese saw. It will come off in the cleaning up.) One nice thing is that by following the previous glue lines, the resulting splice angles should line up pretty accurately and it should only be a matter of needing to refine the surfaces slightly. You'll notice from the following image that I biased my cuts to one side of the glue line so that I could just focus on cleaning up the outside edge on each joint instead of working hard to reduce the interior angles.


I apparently got caught up again in the doing rather than the recording and forgot to take additional pictures of the finished splice during fitting and the glue-up process. Suffice to say, it took a little bit of finessing and I had to use some yew offcuts to fill the gaps (most significantly, the saw kerf from the "inner cut" on the center line, as failing to do so would have shifted the centerlines of the two limbs fractionally). Mostly I think it turned out okay:  I only lost an inch (the stave is now 75 inches overall), but I did decide to add a tiny bit of reflex by joining the limbs together at a very small angle. It is probably not enough to be noticeable, but every little bit counts. I daresay that the joint looks a little more solid than it did the first time, so maybe being forced to redo it was providence?!

Yew "fence post" longbow, part 6 - handle "set back"

Normally when bowyers speak of "handle set back," they mean the shaping of the bow in such a way that the handle is closer to the archer, so "set back" from the back of the bow. In this case I mean "set back" in the sense that ordinary folks use: a failure followed by a temporary delay.

I was feeling pretty good about heat treating the belly and worked from both tips toward the handle. The tips seem to have taken a fair amount of twist correction, and some small amount of reflex was materializing. I thought the glue (Unibond 800) was not heat sensitive--but it turns out I thought wrong. The glue had darkened and bubbled in spots, reminding me of the crunchy foam structure of chocolate honeycomb candy my grandmother sends from the East Coast. On inspection, it looks like I've cooked the glue and weakened the joint. A quick search on-line shows that yes, Unibond can be degraded and weakened by heat. Unibond is a great glue, and frankly I should know better: just about any glue will weaken under any temperatures high enough to scorch wood.

Cooked glue joint!
First rule: Don't panic! All is not lost: I can cut the handle apart and splice it back together over again, but it is going to be work. For one, I could do a neat cut in half and totally recut the splices, but it means losing 4 inches in overall length, going from a 76" stave with 74" nock to nock length to a 72" stave with 70" nock to nock length. That's a considerable loss, especially considering that I fought the initial stave to retain every bit of length I could. I could try to recook the glue and hope it fails then clean up the edges and reglue, but I'm afraid that in doing so I will either a) ruin the wood by overheating or b) not be able to weaken the glue enough to simply pull it apart with my mere mortal strength. Even if I could, I'd still have to clean up the edges and get rid of any trace of the original glue, which could be problematic.

There is a third way between these two extremes, though I'm not happy at the prospect: I can cut the splice apart along the glue lines, refit the joint, and reglue. It will be time consuming and would actually mean cutting a new splice in fresh wood just outside the glue line, then cutting a matching splice in the other limb in such a way that I pare out all of the old glued sections. The advantages are being able to glue a brand new joint while retaining most of the current length (if thoughtfully done, I might in theory only lose a half inch). On the other hand, cutting the center spliced section means having to drill a small hole in the middle of the stave in order to snake a coping saw blade through. There will also be even less room for error, since the stave has already been taken down to final width at the handle. (I might end up losing some there...)

This is not the happiest thing that could happen, but I will say this: I have learned an enormous lesson about glue and heat, and it has already changed my mind about how I want to approach my next bamboo backed osage bow project. This will be a lesson I won't forget -- and I'm sure I'll learn something new in the cutting and re-splicing process.


Yew "fence post" longbow, part 5 - heat treating

Not a lot of pictures for this one... I guess I got caught up in actually doing rather than documenting!

At this point I'm heat treating the limbs for a few reasons:

1. To pull the twist out of the tips of the stave.

By using clamps and weights to create a lever to twist the limb in the desired direction, it is possible to take out some of the twist at the tips. I use the approach of not forcing the limbs against a form. Rather, by using the clamp and weights levered out at the end, the tips are gently coaxed into position as the wood is heated and relaxes. The trick is to try and coax them a little beyond where one wants them eventually, as some of the wood has memory and springs back a little bit. One can see the clamp and the weights in the picture below.


2. To try and add a little bit of reflex into the stave, as it is fairly straight limbed and slightly deflexed in areas.

I know that adding reflex can make a bow more difficult to tiller, but I'm not anticipating adding much: just enough to help make up for some of the inevitable string follow that will happen. As the bow takes set from being worked in, the limbs will start to bend toward the archer. If I can give the bow a little reflexing, the degree of string follow will be diminished in the finished bow (though the amount of string follow may be the same -- it just starts from a different place). Consequently, performance should go up, albeit only slightly.

3. To try and create a little more performance by altering the belly wood. 

Heating the wood on the belly, tempers it and makes it more resistant to compressive forces, which can also slightly increase performance by two means: 1) increasing the draw weight per overall mass or allowing a lower mass for a given draw weight, and 2) forcing the belly to do more work. For the latter, wood is usually stronger in tension than in compression, so having the belly do a little more work can help balance out the load bearing. One downside, though: I recognize that some of the effects of heat treating the belly will be diminished by the fact that the limbs are not at their final thickness, so some of the tempered parts of the belly will disappear under the rasp and scraper. Why not wait until later? I plan to back the bow with rawhide using hide glue, so I don't want to soften the glue with heat and have the backing come off. As with many things, bow building is a matter of compromises!


Sunday, September 7, 2014

Diversion: PVC bows

Well, it's not woodworking, but it still pertains to bows and how they bend...

I decided to undertake making some PVC bows with an eye toward supplying those who don't have access to archery bows with something cheap and relatively quick to make. I got the idea this summer after visiting Raptor Archery. My kids were handed one of the bows -- which of course have flashy paint jobs and come in cool shapes (more than half of the appeal, if you ask me) -- and I was told that the store had a book about it. It was inexpensive, so I picked it up. (For those interested, it is Simple PVC Pipe Bows, by Nicholas Tomihama.)

For those who don't know, the basic premise is to take PVC pipe and heat it with a heat gun (or other heat source), then to flatten parts by clamping in a simple caul. The flattened sections are weaker, so allow more bend, while round sections are stronger and allow less bend. In essence, it is very easy tillering, since the material is homogeneous.

It seemed like a good way to try them out was to make them for the kids. The youngest (age 5) is pulling #9 @ 16" on our Martin all-fiberglass 50" bows. The oldest (age 9) is drawing about #16 @ 22". Hopefully I could make something that has just a slightly stronger pull at the same draw weights, partly as a way of allowing them to grow as archers and partly as a way of increasing their performance and minimizing arrow "bounce-outs."

My first try with 1/2" PVC had the usual learning-curve problems -- I heated the PVC too much/too fast, cooled it down too quickly so that it split the tube while clamping, etc. The second go was more successful, yielding a stylized "horse bow" of about 46" ntn length, #32 @ 26 on the tillering tree (though I did bring it to a full draw of 28" while shooting). This was made using 3/4" PVC, and I must admit it looks pretty cool. Sadly, it took about 3-4 hours of time (more time than I had wanted to spend on it), though that is fast compared to working with wood and probably not too bad for learning the process.

"Horsebow" at brace...

...and at 22" on the tillering tree.

At 28" draw.
A third try was made using 1/2" PVC salvaged from the first go (I cut out the bad sections.) The overall length was of only 40", yielding 39" ntn length, in "longbow style" (i.e. no recurves) and with narrowed tips (made by cutting out a section, heating to move the tips together, and then gluing the split tip back together). Of interest: Each section taken out of the tips removed about 175 grains of weight -- a significant weight savings, though it was offset by the noxious nature of the glue. This little bow ended up coming in exactly at #9 @ 16" and #16 @ 22", pretty much identical to the Martin fiberglass bows, with the downside that the PVC ended up both slower and lacking in the stability that a longer limb-length gives.

Short "lonbow" at brace.

At 20" on the tillering tree.

How did the kids take to them? All were wowed by the shape of the horse bow but complained that it was way too strong. They all liked the smaller bow, as it seemed comparatively easy for them. Interestingly, they all thought it was easier to pull than the Martin fiberglass bow, even though it is exactly the same draw weight and despite the shorter limbs creating more finger pinch. I'll have to assume that it was either a) the novelty of it creating a more favorable review or b) the comparative ease of drawing it after trying the heavier bow [or c) a combination of the above].

How do I feel about PVC as bow material? Well, it was an interesting project, and I see both the positives and negatives:

Pros:

  • it requires little time commitment
  • material is minimal, cheap, and accessible
  • little expertise is needed
  • being able to get bows into the hands of non- or would-be archers
  • being able to fancifully decorate a bow (and not feel guilty about covering up beautiful wood)

Cons:

  • the end product might not be durable and is not something I would want to pass on
  • short limb length means less stability
  • dense, sluggish material gives poor cast
  • material is inorganic and creates a plastic "saw dust" that clings to everything
  • possible negative environmental impact?
  • skills are not very transferable to real bows
By this last point, I mean that this is a one-way street. Based on my knowledge of bow building so far, I would say that everything I have learned about the way real bows bend and work can be applied to the PVC to make a decent bow, but there isn't a single thing I learned from the process of working with the PVC that would assist me in making a real bow. So if you are thinking of trying to make your own PVC bow, just know that this is the case. PVC bows might make you an archer faster, but they won't make you a bowyer any sooner. 

Quick and inexpensive they may be, but it was a sad task working with a lifeless object with the personality of putty. There is something sacred about working with wood, knowing that nature has provided one with a bit of itself; and that this bit is a good bit compared to all the other wood that had to be rejected. Working with wood and thinking about it in this way forces one to slow down and treat the material with reverence. PVC, not so much. (Ok, so I reused the failed bow from the first trial, but only because I can't stand the idea of waste. Even my offcuts make their way into projects when I can.) Yes we can work fast, but as Dean Torges put it best, "Let's not punch time clocks in our sport as though it were indifferent to our best efforts, at least not until we also value loving and praying as fast as we can."


Friday, August 29, 2014

Yew "fence post" longbow, part 4 - profiling

Now that the limbs have been spliced together at the handle, it's time to survey what lies in store and plan the bow accordingly.

Right now the overall length is 76", so will likely yield a bow around 74" nock to nock. This is good, as I'd like to tiller this as an English "warbow" of lighter weight -- maybe in the 60-70# at 30 (or 31? 32?) inches. The extra length will help here. Although it is meant to be a bend-through-the-handle bow, I'll want to stiffen up the handle section a little so that no undue tension is put on the spliced joint.

First, the back. One can see several of the flaws in the sapwood. Because of the narrowness of the resulting stave, there really isn't much room for avoiding some of these problems. The sapwood is also not very thick, so reducing it in thickness would not leave enough to make a decent selfbow, so I'll plan to back this with light colored rawhide, which will allow the appearance of a yew bow with the cream/brown contrast between the back and belly.


The twist at the end of the limbs can be seen fairly clearly now. The two photos below show the orientation of the crown at the tips compared to the center and middle part of the limbs (oriented correctly, with the crown centered).


The twist is not that great, but enough that I don't want to be wrestling with it while I'm tillering the bow. It is also worse at one end (the good end) than at the other. I'll plan to heat treat the belly some, and in the process I'll use some clamps and weights to gently coerce it to falling in line with the rest of the bow's crown.

Problems await on the other side, as the two knots I mentioned before could not be avoided. One is smaller than the other, and it may quite likely come out in the reducing of the belly thickness. The bigger one goes through to the sapwood side (but just a touch) and looks pretty solid so far. Hopefully I'll just be able to leave it along (or shoot it through with a spot of thin super glue) and get along nicely. The third image below shows the two knots in relation to each other; the smaller one is closer to the tip.


After lots of fussing, I managed to capture the center and crown of the stave. I mark it out using a line with chalk. The chalk is bluish-purple but comes off readily with water (or a little bit of sweat from one's palm). I use that as a rough but straight line, then follow up by marking over that in pencil, which does note rub off as readily. Then I marked the full width of the stave, 30mm at the center 4" section of the handle and 20mm at the tips. (Like many others, I switch between units of measure as a matter of convenience, marking out in mm when more precision is needed.)


You'll notice some dotted lines near that big knot. The dots actually follow the grain, and I'll respect that when I cut out the shape, leaving a little more wood around either side of the knot to help compensate for any weakness this section of the bow has.


When cutting out on the bandsaw, I did my best to keep the top of the crown uppermost, rotating the stave as it went through. In this way, the wood at the sides is always oriented perpendicular to the back, with the crown centered. It makes for some glaring twist, now that the excess wood has been taken away, but again, it will (hopefully!) come out when I heat treat and twist the tips into alignment. (In reality, they get twisted a little farther, as wood has memory and they will want to drift back to their previous position a bit.)


The true extent of the rot damage is now showing itself. It travels the limb a fair degree, but that will all be waste wood at the end of the day as the tips finally thin out, as can be seen in the second photo where I've marked the intended starting depth of 20mm at the tips.


Other sections are going to cause some challenges. Here's a section where at one time there may have been a limb. Now it is just an area where the grain runs in a divot and has cut into the working part of the limb. Some will be removed in initial thicknessing (see the pencil lines), and with luck the rest will as the belly is being shaped and tillered.


Similar challenges abound in the spliced handle section. The bow will be thickest here, but it is also where there's the least amount of wiggle room with the remaining wood. Pencil lines again show what will be removed, but there are still some significant sections of beveled wood remaining. 


[...time elapse...]

Finally the stave is brought closer to working depth by sawing off the waste wood outside the pencil lines. The dimensions I'm starting with are 20mm by 20mm at the tips and 30mm by 30mm at the handle section. We can't build a bow by numbers, but this is a starting place so that I can try and get the bow bending a bit in floor tillering. A quick weigh-in finds the stave at around 36 oz. -- which is about twice as much as it will eventually be if aiming from 70# @ 30", according to Steve Gardner's Mass Principle.

In working down the limbs, one can see that the small knot is close to disappearing. Right now it is a tiny hollow bit, which will likely come out altogether as the belly is reduced. On the other hand, that large knot has gotten slightly bigger -- and a whole lot more rotten, as the solid part came off with the waste! Just goes to show that one never really knows what lurks beneath.... I'm not sure how far the punky bits go, but I'll no need to plan to scrape out the bad bits and either a) fill the hole with a glue and sawdust mixture or b) make a wooden plug. In either case, since the knot is slightly visible on the sapwood, I'll have to assume that it is nasty all the way through.